
What is this? Your boat’s checkbook. Track what was spent, when, on what, who paid, and (when you remember) who got paid — with receipts attached.
The Basics
Each Expense captures a single transaction:
- What it was for — a type (Cleaning & Detailing, Fuel, Dockage, Marine Service, etc.) and a name.
- When and where — expense date, and what it’s tied to (the boat, or the engine, equipment item, inventory item or task you added it from).
- Money — currency and amount.
- Who — who paid (someone on this yacht) and who got paid (a contact or a free-text vendor name).
- Proof — an attached receipt (photo or PDF).
- Status — picked from a list (for example Draft, Pending, Approved, Paid, Rejected). New expenses start as Paid. There is no separate approve or reject button; you change the status.
The Expenses tile shows every expense on the boat. Expenses added from a specific engine, equipment item, or task also show on that item’s Expenses tab — so the cost of maintaining the port engine over five years is one tap away.
Key Things on This Screen
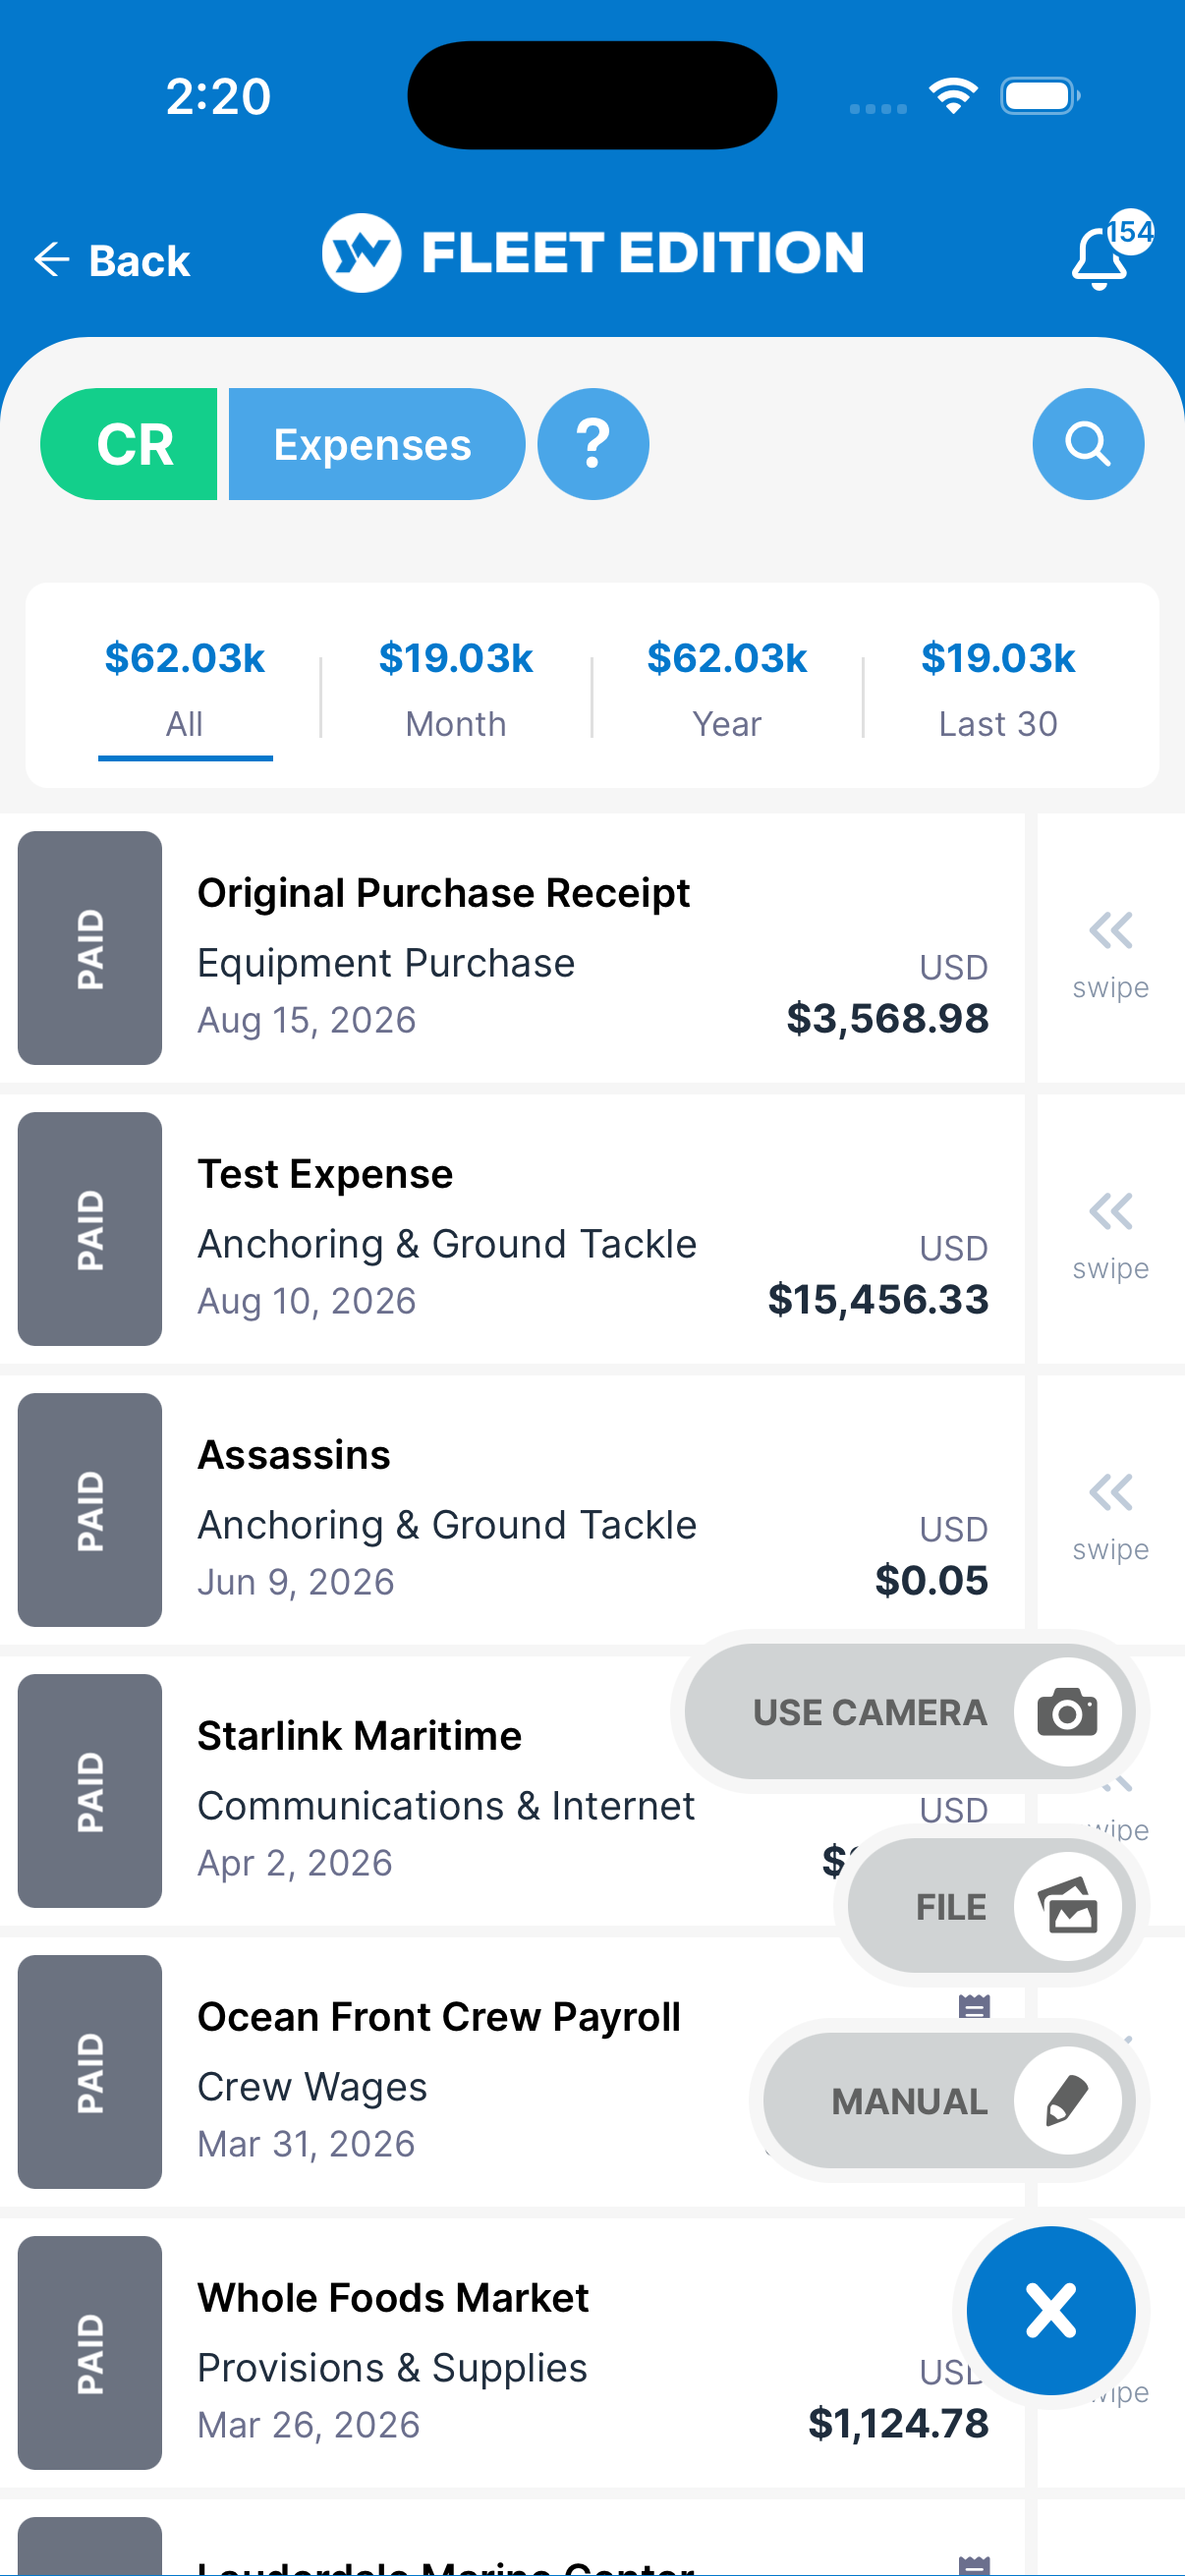
- Expense tile — Vertical status bar (left, color-coded, with the status name), expense name, a receipt icon when one is attached, the type, and the amount with currency.
- All / Month / Year / Last 30 — Totals across the top. Tap one to show only the expenses in that period; tap All to see everything again.
- + button (lower right) — Opens three choices: Use Camera (scan a receipt), File (attach a receipt you already have), or Manual. You need a connection to add an expense.
- Search — Searches expense name and type.
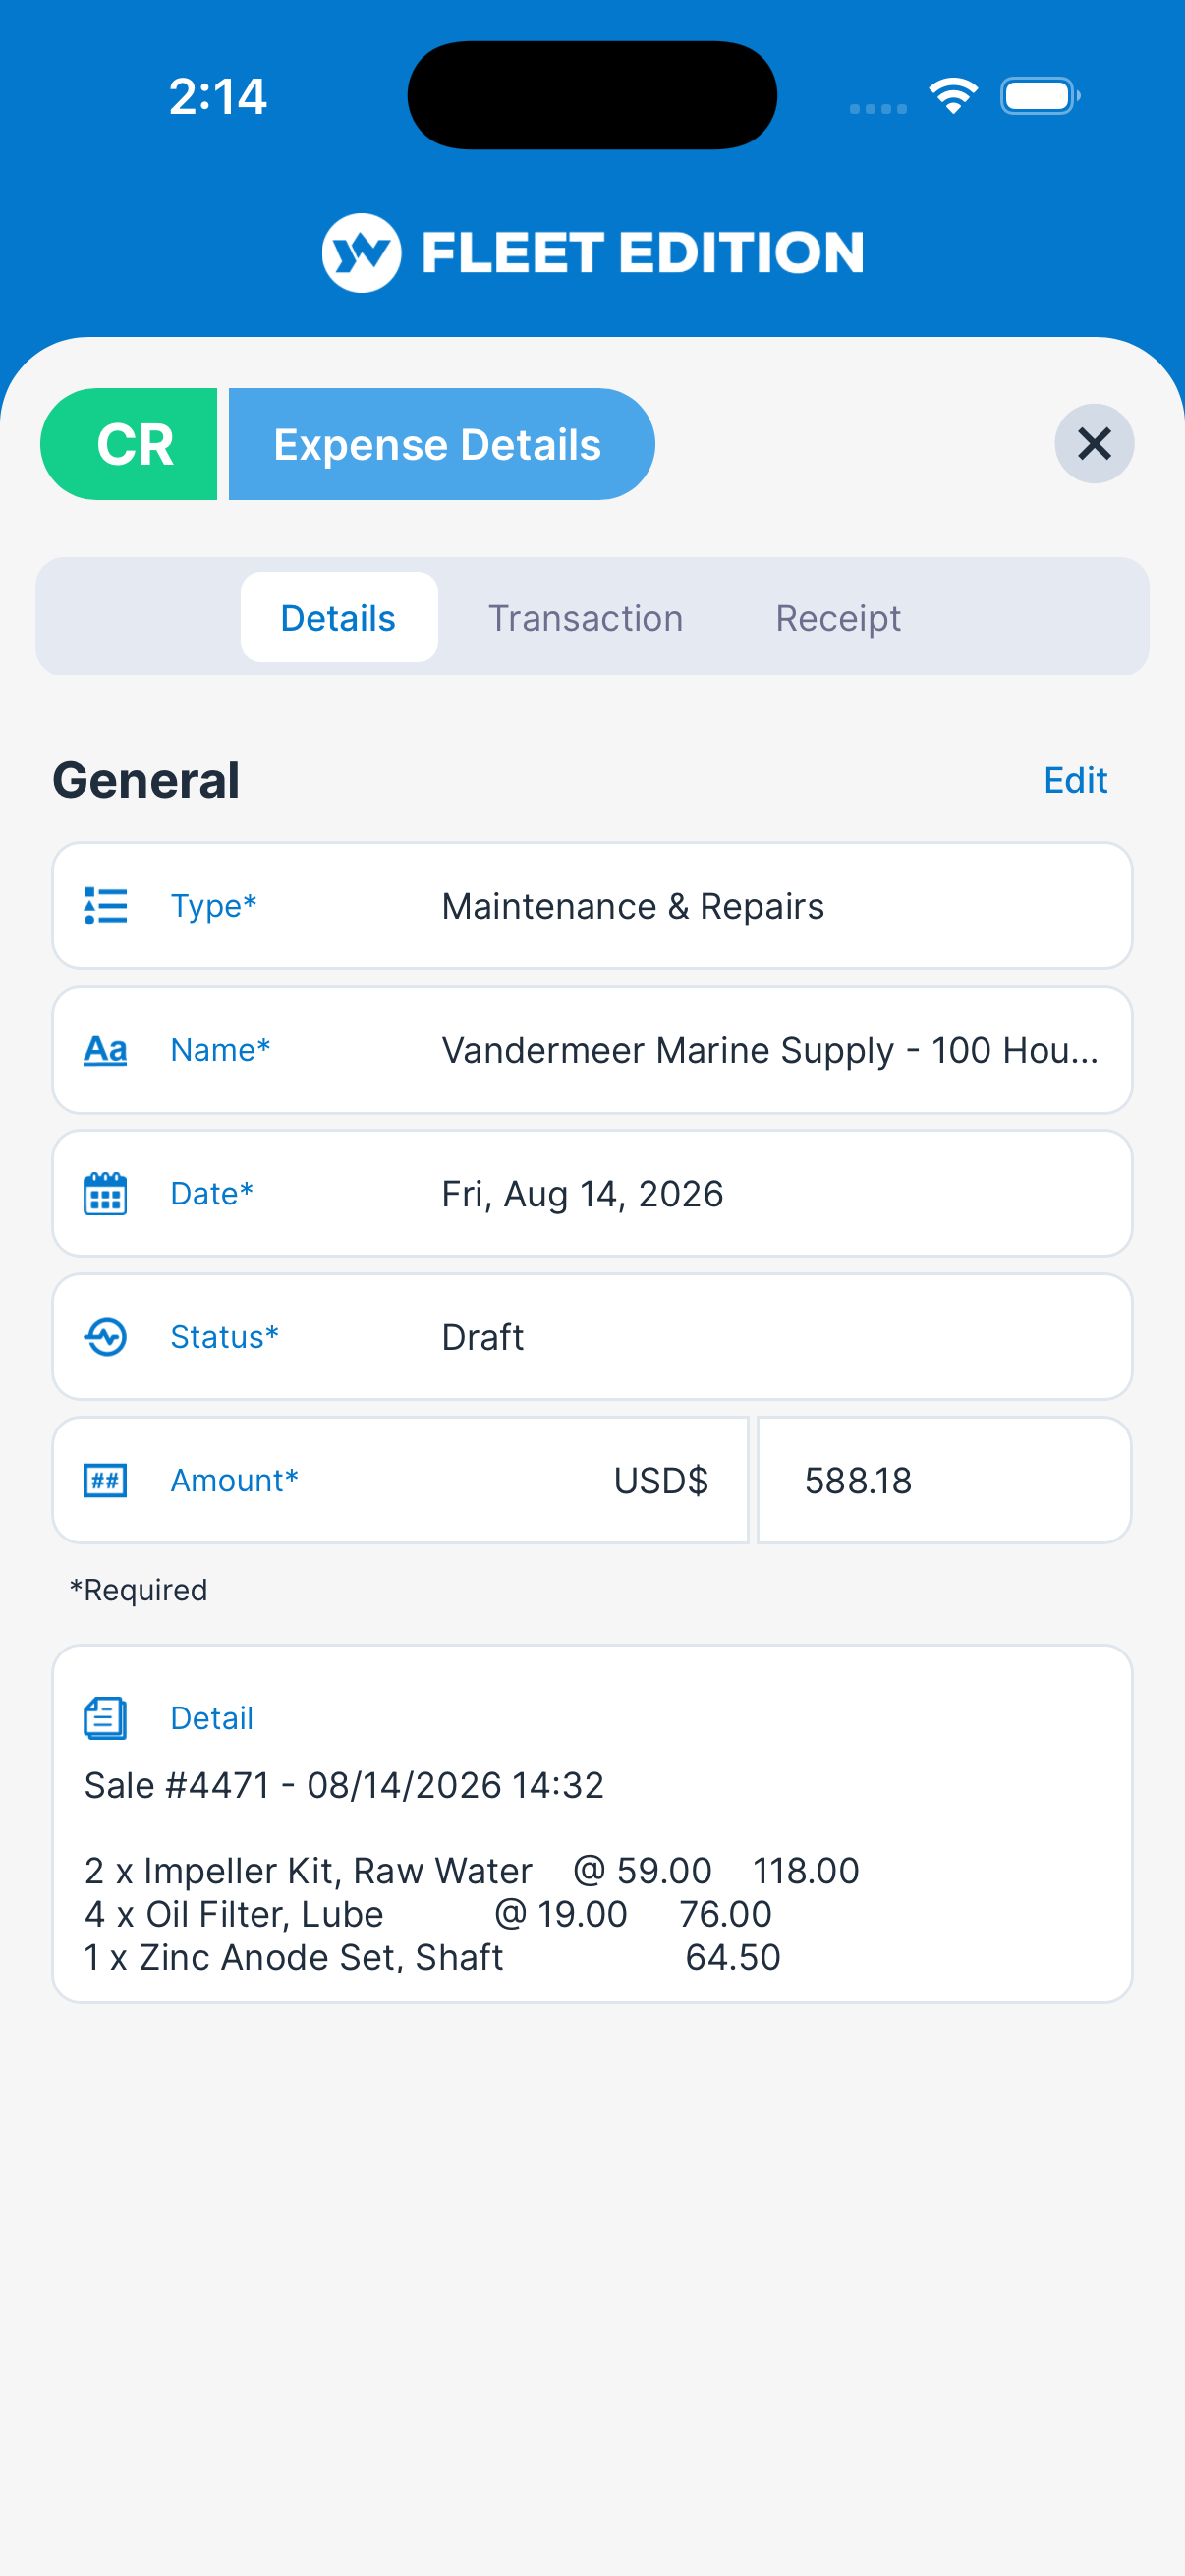
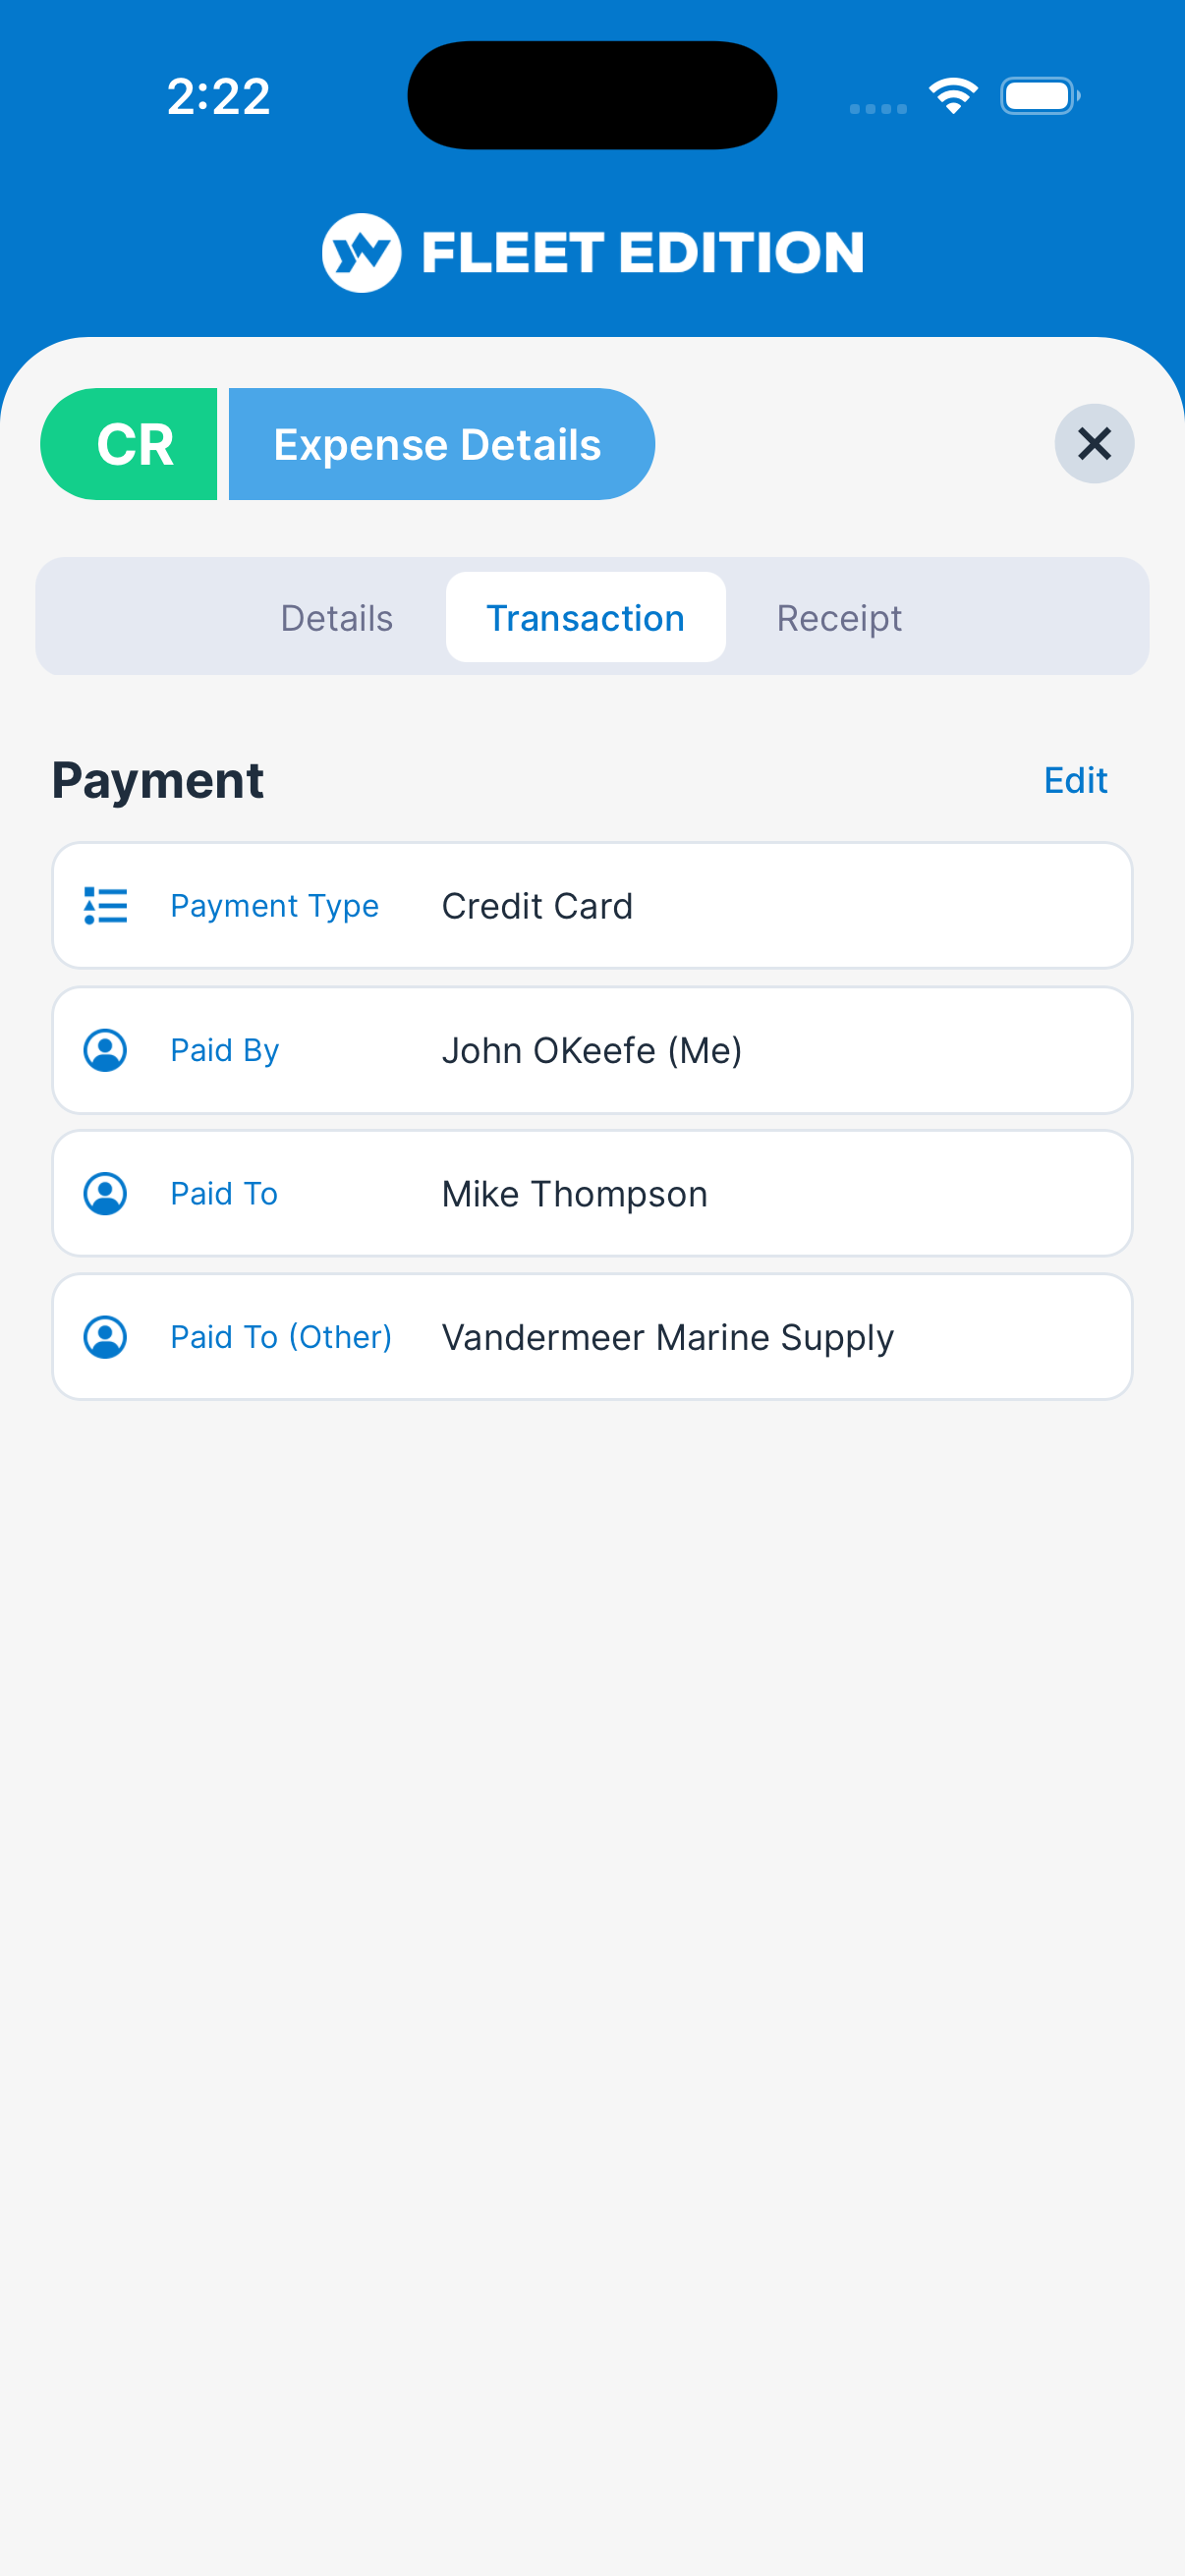
- Tabs on an expense — Details, Transaction (how it was paid), Receipt, and Audit Log when your plan includes it.
How to Add an Expense
- Tap the + button and choose Use Camera or File to start from a receipt (YACHTWAVE reads it and fills in what it can), or Manual to type it all in.
- On the Details tab, pick a Type (required), enter a Name, and set the Date and Status (new expenses start as Paid). Pick the currency and enter the Amount. Add any Detail notes.
- On the Transaction tab, set the Payment Type (cash, card, check, etc.), Paid By (pick from people on this yacht), and Paid To (pick a contact, or type a vendor name in Paid To (Other)).
- Tap Add at the bottom.
How to Attach a Receipt
- Open the expense.
- Tap the Receipt tab.
- Tap Scan Receipt to snap a photo, or Attach Receipt to attach an existing image or PDF.
- The receipt is stored with the expense and shows on the Receipt tab, where you can zoom in.
Tips
- Tie expenses to a specific engine or equipment when you can. Adding the expense from that engine’s Expenses tab means the cost shows up there too — invaluable when you’re tracking the total cost of ownership for a single component.
- Set Status thoughtfully if a crew member submits the expense. New expenses start as Paid, so change it if the expense still needs review. The vertical color bar on the tile tells you at a glance.
- Receipt photos are best taken on the spot. A blurry phone photo at the pump is a thousand times better than the lost receipt three weeks later.
- Use the web version to back-fill historic expenses from a spreadsheet. Copy-paste from your tax records is dramatically faster than re-typing on a phone.
- Capture currency correctly. YACHTWAVE supports multiple currencies. A USD expense and a EUR expense on the same boat are kept distinct on reports.
Troubleshooting
- “The Paid By picker is empty.” — Only crew members on the yacht appear. Add yourself or the payer to the yacht first via Sharing & Crew.
- “I tied an expense to an engine but it doesn’t show on the engine’s Expenses tab.” — Pull-to-refresh on the engine’s detail. The sync isn’t always instant. If still not appearing, the expense was probably added from the Expenses tile, which ties it to the boat. Only expenses added from the engine’s own Expenses tab show there.
- “My status color isn’t changing when I edit the status.” — The color is driven by the status definition on the server. If you’ve picked a status and the bar didn’t refresh, pull-to-refresh on the list.
- “My receipt upload failed.” — Receipts can be up to 40 MB each. For very large PDFs, reduce them with the share/export tools on your phone first. JPG/PNG receipts work best.
- “My currency symbol is wrong.” — Edit the expense and check the currency picker beside Amount. It’s per-expense, not per-vessel — new expenses start with your phone’s currency.
- “I can’t edit or delete an expense.” — It has been locked, so it opens read-only. Ask the boat’s owner or your organization’s admin.
Frequently Asked
Can I generate an expense report?
Yes — the web version has a richer export and reporting view. Filter by date range, type, or object and export to CSV.
Can I import expenses from my bank statement or credit card?
Not currently. Each expense is added individually. Bank/card integration is on the roadmap.
What does the colored vertical bar on the tile mean?
It's the expense's Status. The color comes from the status definition; the label on the bar tells you what state the expense is in.
Can multiple crew submit expenses against the same yacht?
Yes. Each expense records its Paid By user, so submissions from multiple crew members coexist cleanly. Use the Status field to track which ones the owner has approved.
Are expenses synced across devices?
Yes. Anyone with access to the yacht sees the expense list. Edits sync within seconds when both devices are online.
Can I attach a maintenance log to an expense?
The cleanest pattern: create the Maintenance Log first (with all the technical details), then create an Expense for what it cost, with the same engine/equipment tied to both. You'll see both records on that engine's detail screen.
See Also
- Inventory — to track what you bought to restock.
- Maintenance Logs — for the technical record of work performed.
- Mechanical and Equipment — tie expenses to the asset they’re for.
- Sharing & Crew — control who can submit expenses on a yacht.